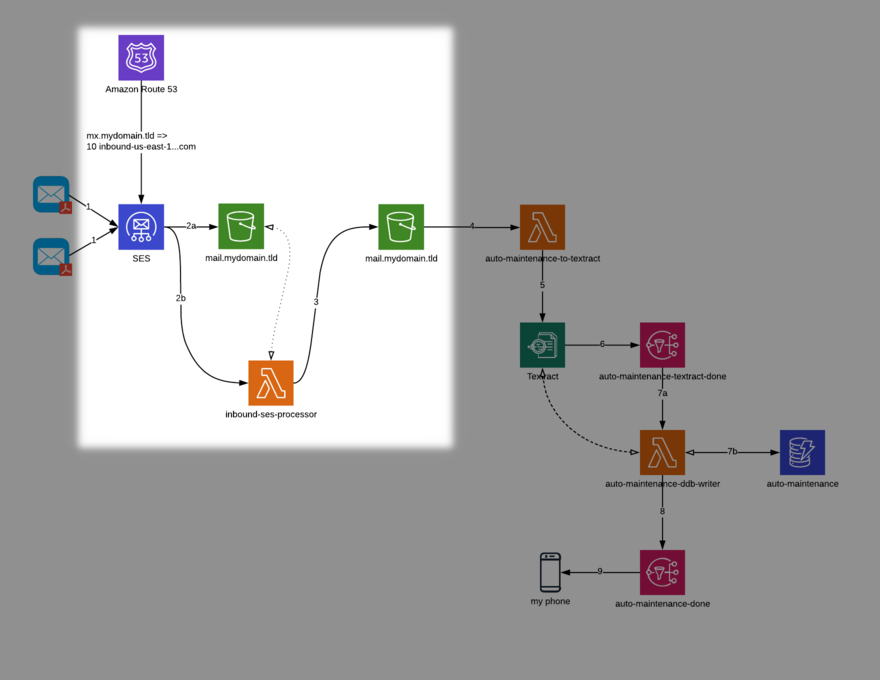
In the first post of this series, we looked at a solution to allow us to define a serverless, email-based workflow to extract relevant information from auto maintenance invoices. Even in this age of accelerated digital transformation, there are still many scenarios in business and life where we receive data that is not in a machine-friendly format; we are building this solution to address these kinds of situations. We use the Serverless Framework to build the core of this solution. We create a few resources and configuration items in this post manually, but you are certainly free to manage these elements with something like CloudFormation or Terraform if desired. This post focuses on the resources highlighted in the figure below, where we design a solution to land incoming emails with S3 and SES, and sort them with a Lambda function:
I have written code that comprises the first Lambda function; it is available in the project repository on tag v0.0.1. The repository contains documentation regarding how to deploy the solution there, so I am not re-addressing that concern here. As noted in the README of the project repository, there are a few dependencies that you need to take care of before you deploy the Serverless stack. They are:
An S3 bucket to land your email. At a bare minimum, I would recommend setting your bucket up with SSE-S3 default encryption.
Control over your own domain. (Later, we will need to set up an MX record to point to SES for inbound routing and processing.)
Locally, you need to make sure you have the following configured:
Valid, working npm in your PATH.
Valid, working serverless (or sls) in your PATH.
Valid, working python in your PATH (this should be some rev of Python 3.7).
Once those considerations are taken care of, work through the remainder of the instructions in the README file. The first step is to copy the config.yml.example to a file called config.yml. Once this is complete, you then need to update it with appropriate values. You can get the first value – account – by running the following in a terminal:
$ aws sts get-caller-identity --profile your-profile --output text --query 'Account'
The remaining values, located under the mail key are relative to the domain you want to use, the name of the bucket you created to land your mail in, the region in which that bucket exists, and a pipe-delimited list of email addresses from which you would like to receive mail on this domain (supplying an empty string – e.g. "" – disables the whitelisting functionality).
Once these values are populated, deploying the function is quite simple with Serverless.
$ export AWS_PROFILE=your-profile
$ export AWS_REGION=your-region
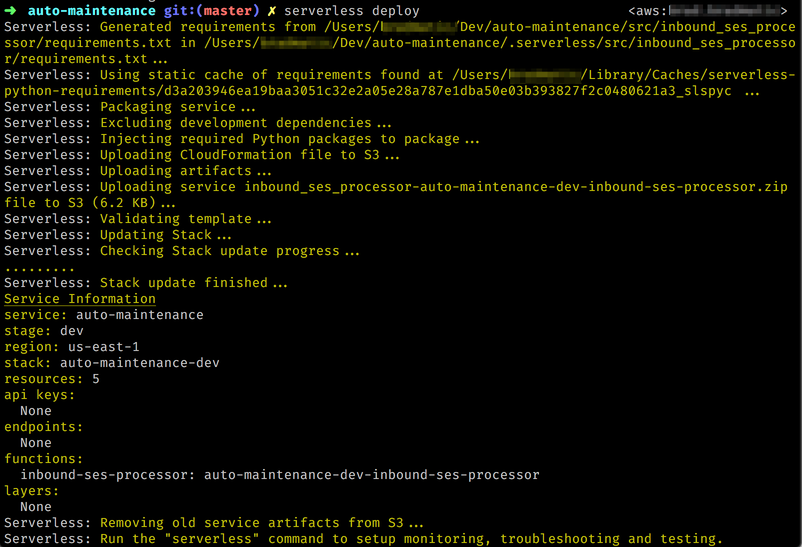
$ serverless deploy
This action deploys the function to your account. When you deploy, you will see console output similar to the following. With the deployment finished, it is time to configure SES to receive mail for your domain, store it in S3, and process it with your newly-deployed Lambda function.
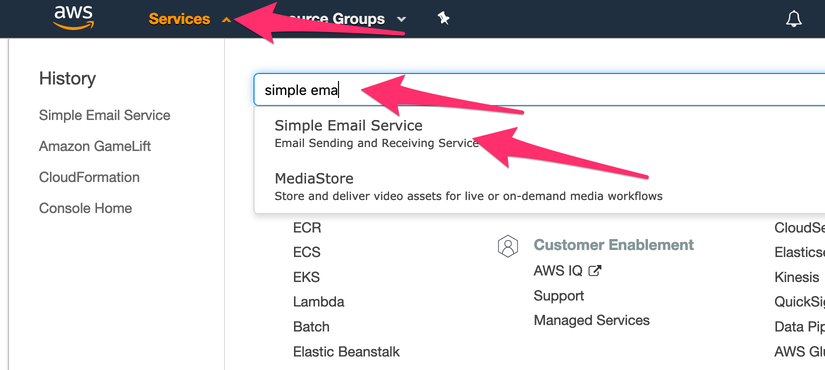
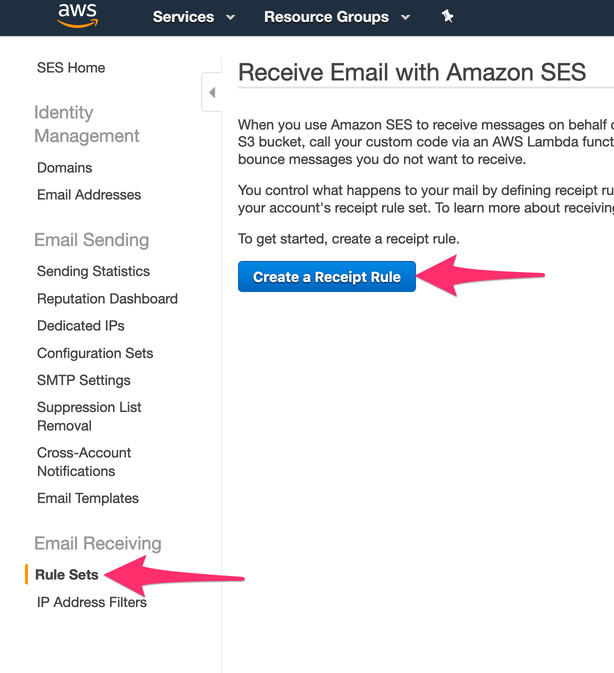
If you have not configured your domain for use with SES, you can do so by following AWS’s documentation. Once you have SES configured for usage with your domain, you need to set up a rule set in SES to process incoming mail. (Note that setting up the domain and the ruleset doesn’t actually dispatch mail on your domain to SES until you update your domain’s MX record [which we do later].) Set up a ruleset by navigating to the SES portion of the AWS console.
Once you navigate to the SES portion of the console, begin by clicking “Rule Sets” under the “Email Receiving” heading in the left sidebar. Then click the “Create a Receipt Rule” button.
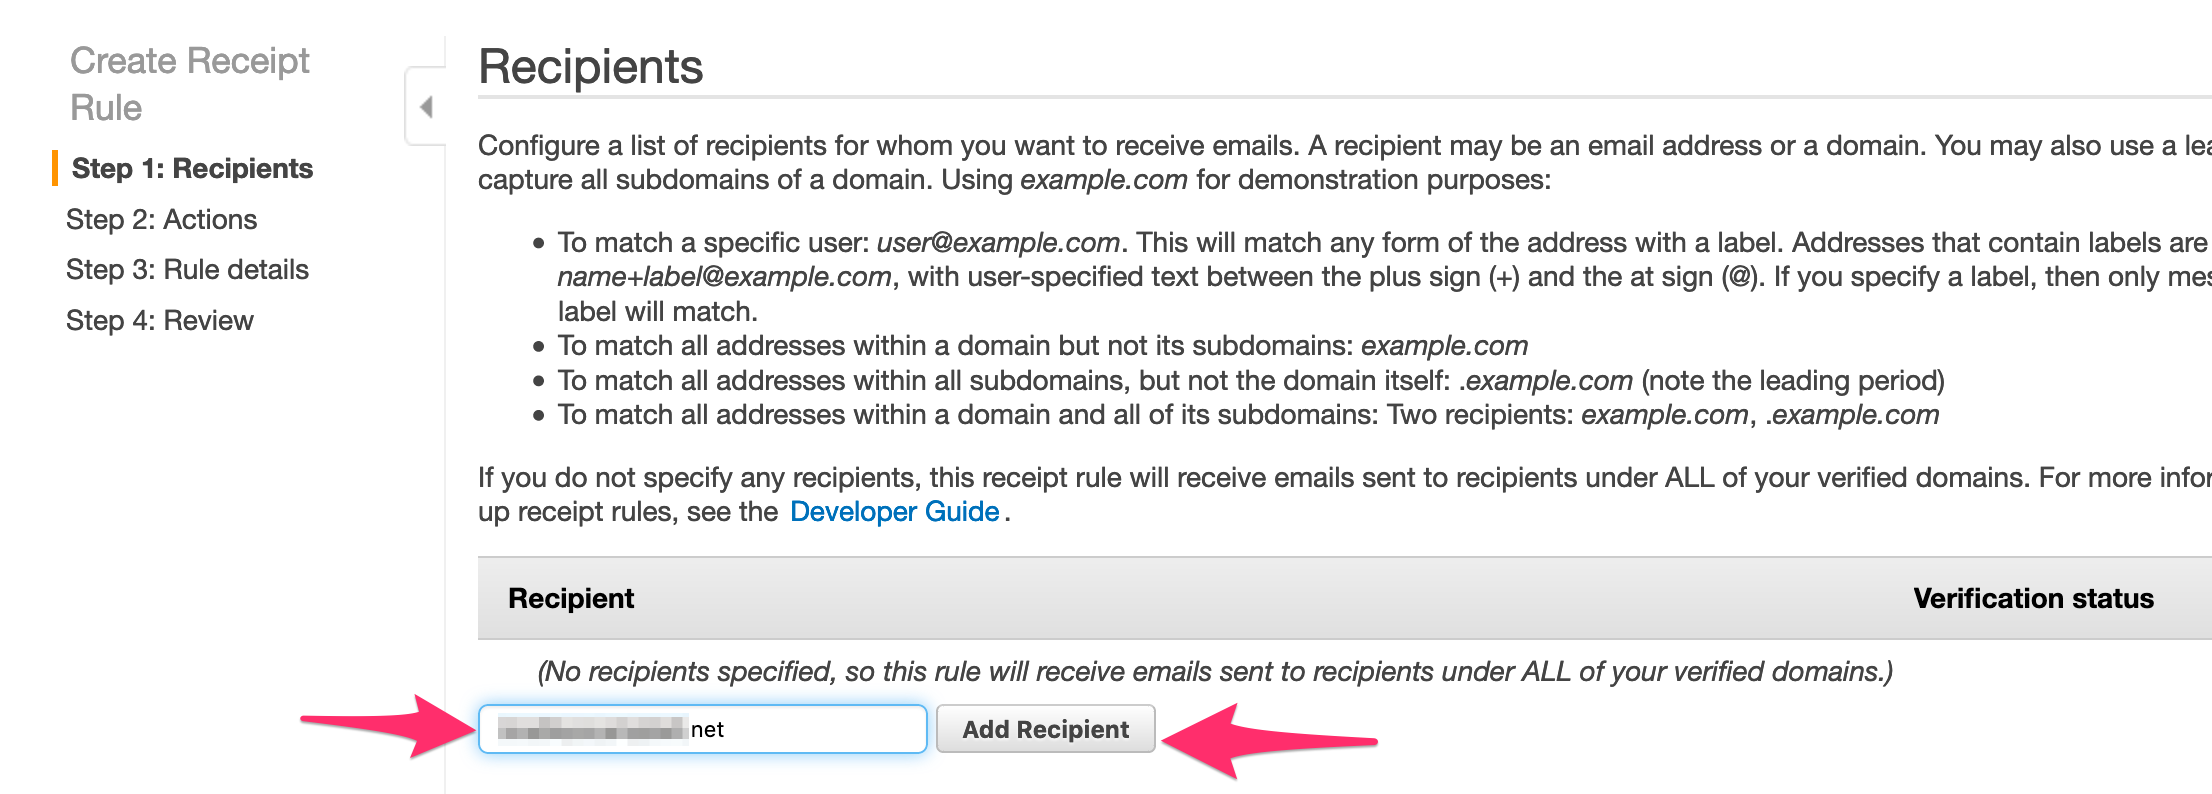
Add the name of the domain (or single address) you want to receive mail at for this solution. Click the “Add Recipient” button.
Assuming the domain (or address) was successfully verified previously, you should now see that recipient as verified in the receipt rule screen. Once you see that the recipient is verified, proceed to the next step.

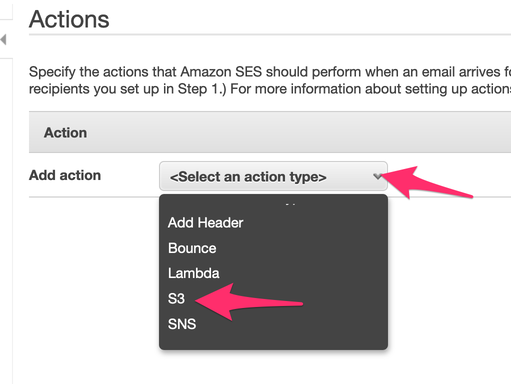
Next, we add actions to our receipt rule. The first action you add is to land the mail in S3.
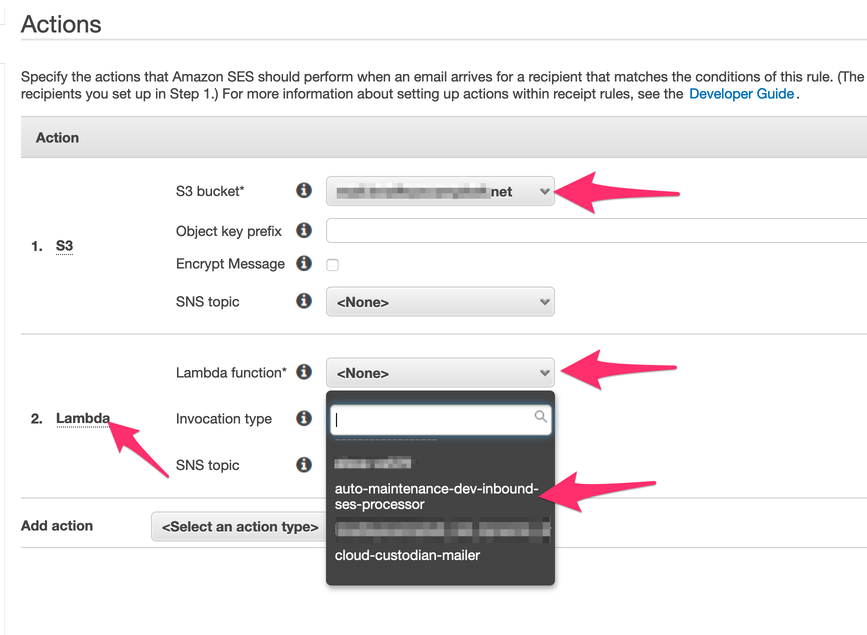
With the S3 action added (use the mail bucket you created previously), now add a Lambda action (order matters here). Choose the function we deployed previously in this post using Serverless (your name should match unless you changed the stage when deploying from the Serverless CLI). Leave the “Invocation Type” as “Event.” Once you have added these actions as shown in the following figure, feel free to proceed to the next step.
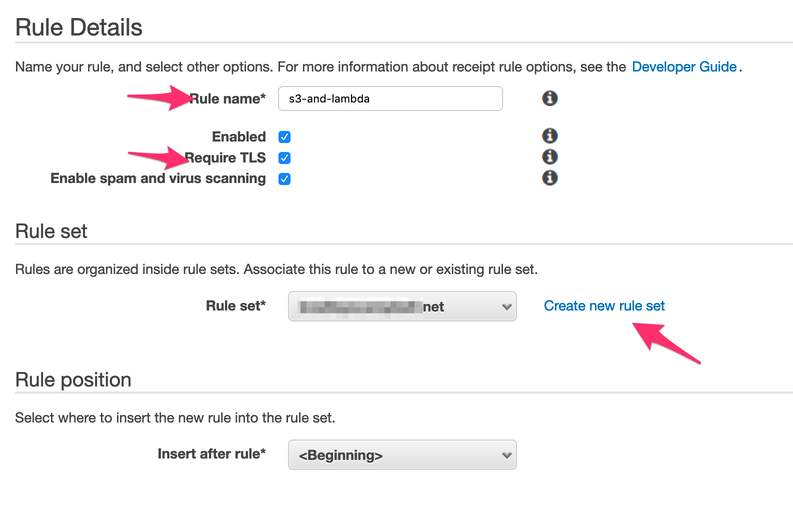
Now, name your rule set – I named mine “s3-and-lambda”. You can name yours anything you like, as long as it conforms to the rules laid out in the console. I would also recommend: forcing TLS and naming the ruleset (by clicking the “Create new rule set” link under the “Rule set” heading). Once you complete these steps – as shown in the following figure – proceed to the next step.
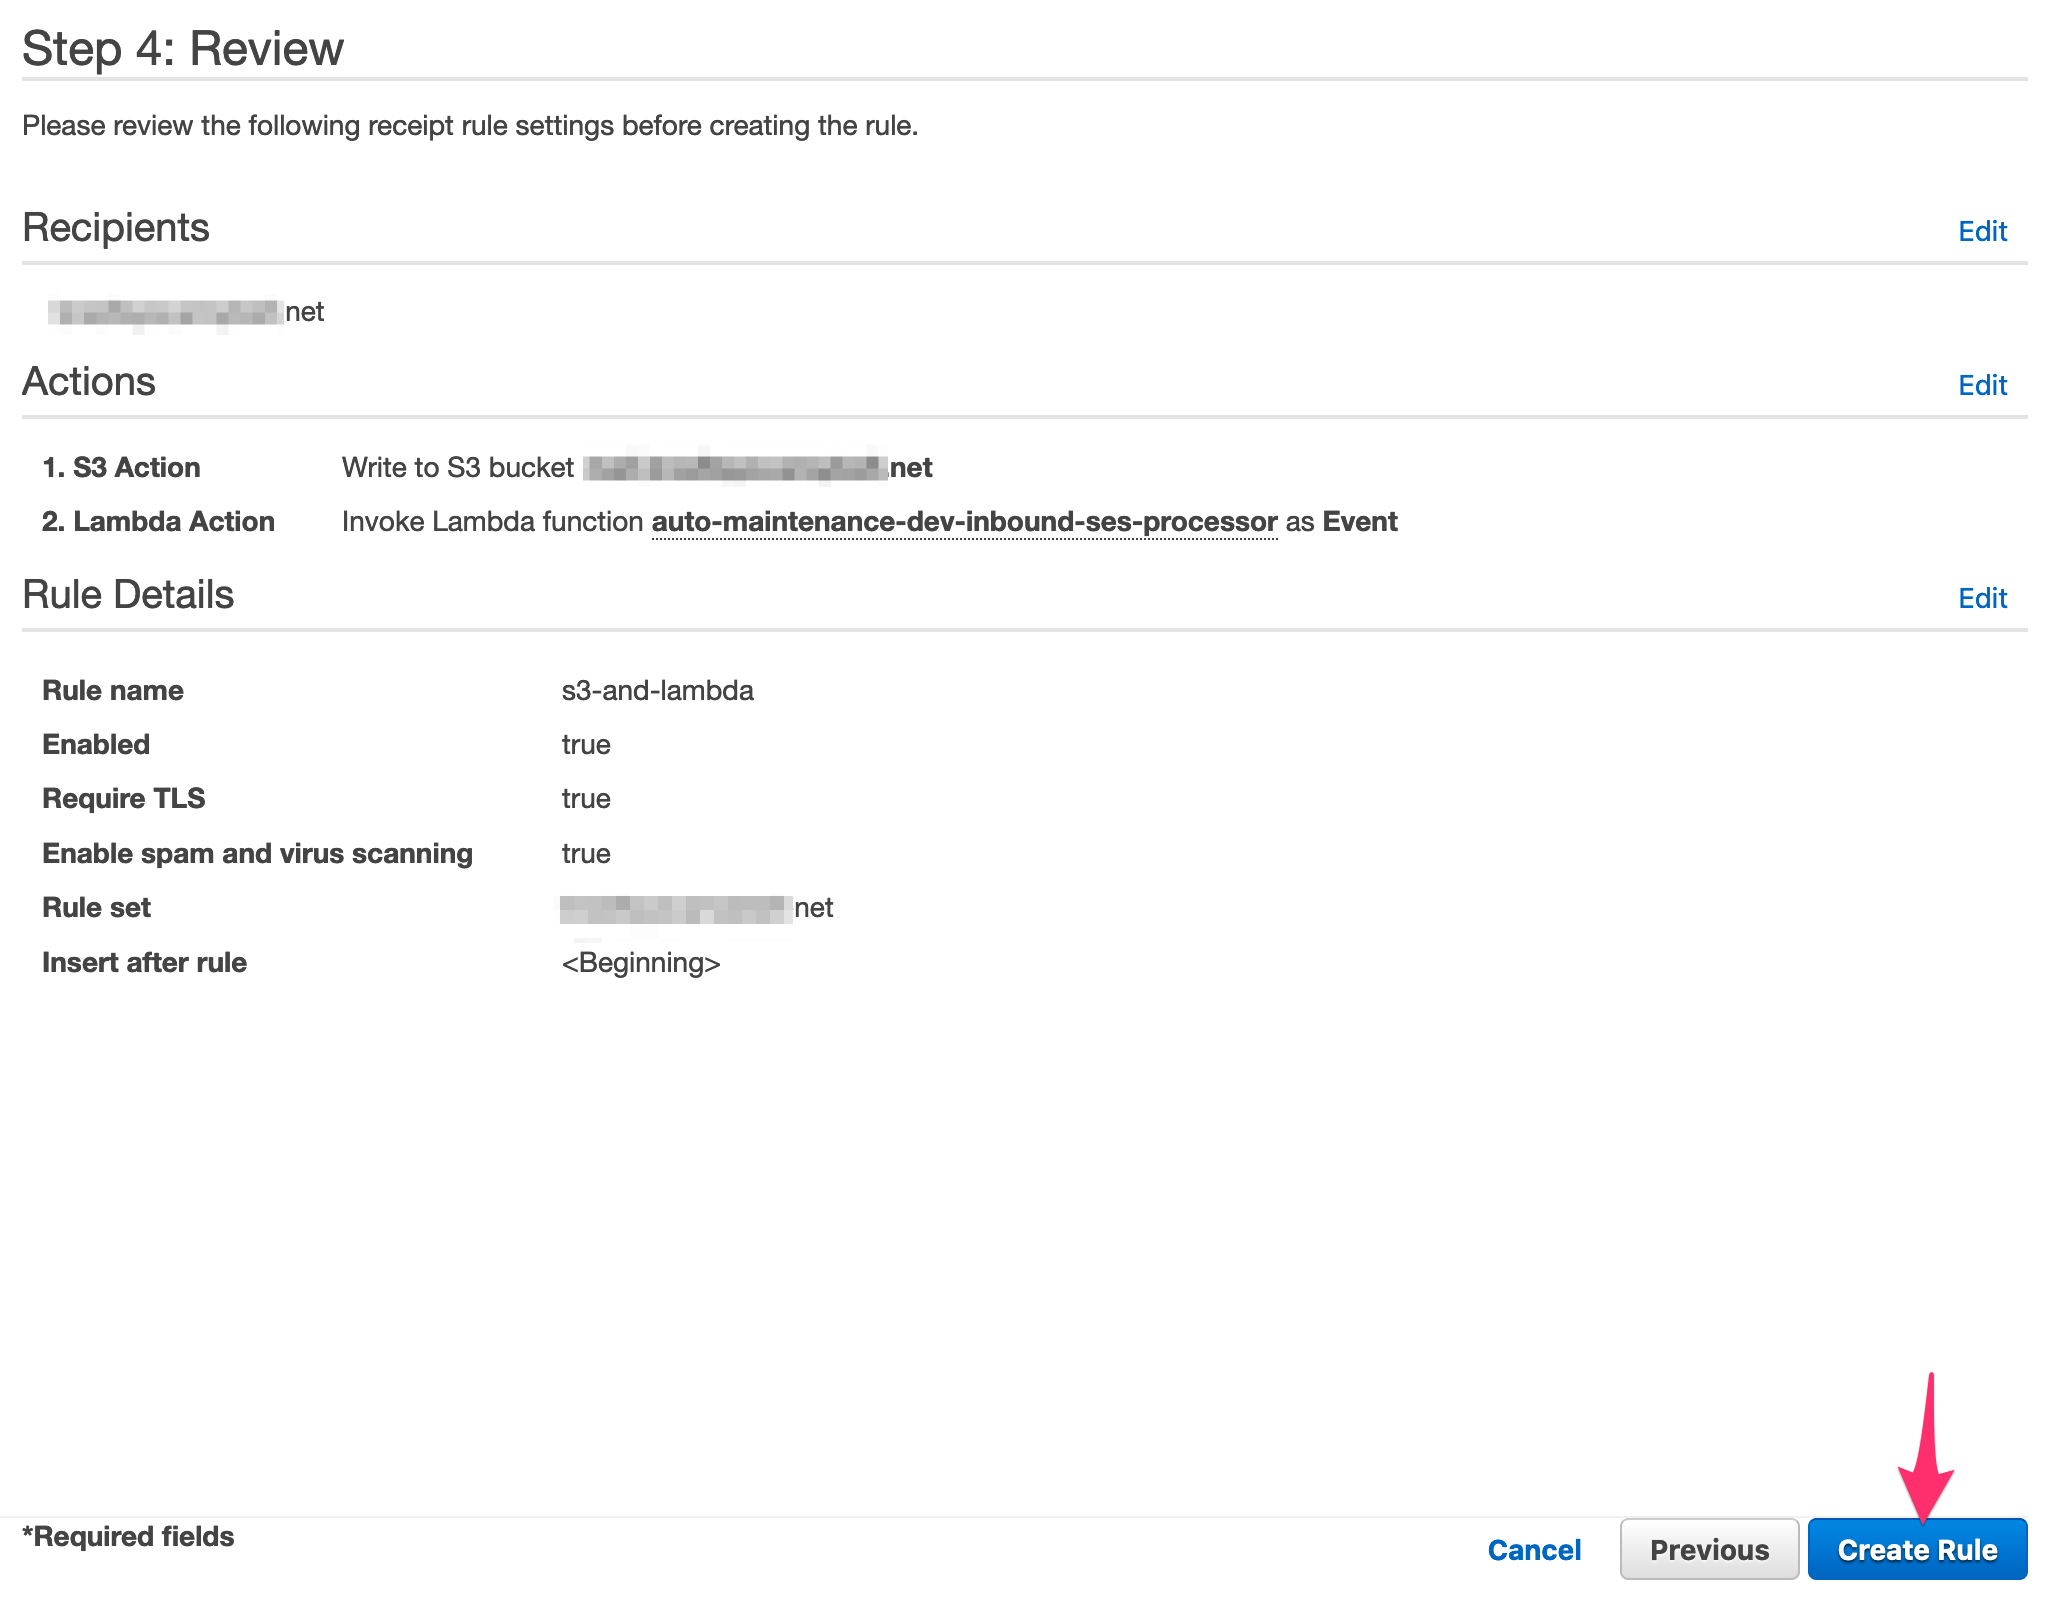
In the final step of the ruleset creation process, let’s verify and create our ruleset, as shown in the following figure.
Congratulations! Your ruleset is now set up! Now you are ready to add an MX record to your domain to allow SES to process the inbound mail on your behalf.
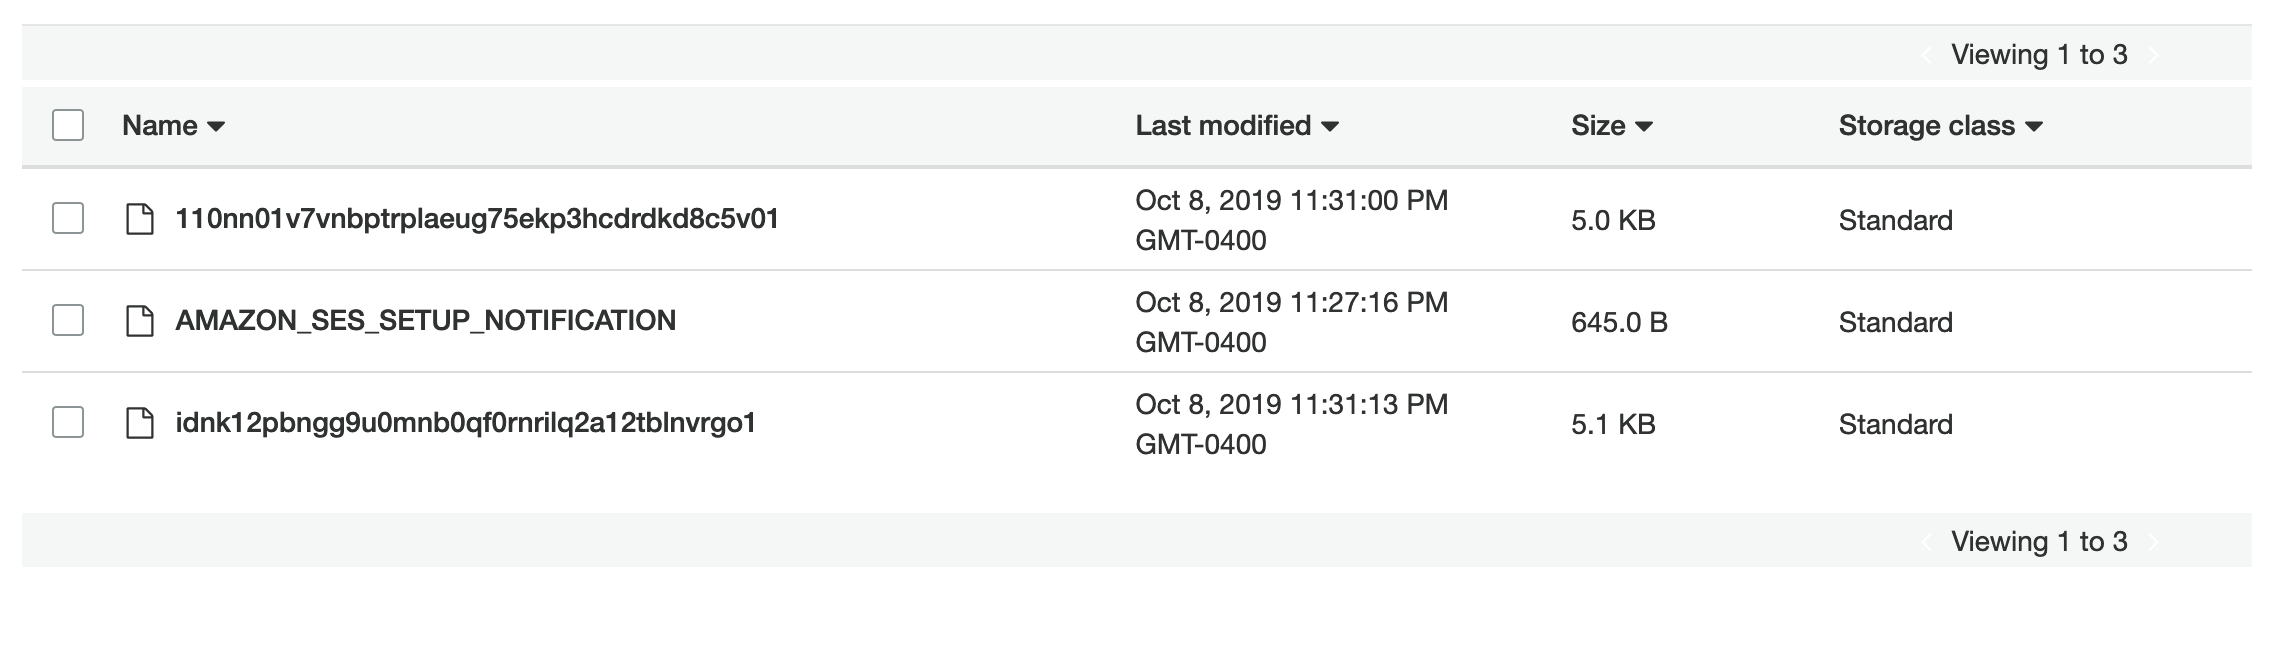
That wraps up the hands-on work for this post. Before we depart, however, I want to show you briefly the purpose of the Lambda function that we have added here. Without the Lambda function as part of the ruleset, any incoming message ends up creating a randomly-named object on the root prefix of the bucket, which looks like this.
With the addition of the Lambda, the messages get sorted into prefixes specific to the recipient. So, an email to brad@ and testing@ (the message to testing@ also contains an attachment named report.pdf) get sorted in an intuitive fashion, like so:

Also, notice that the attachment I mentioned previously was stripped out of the message and stored in a message-specific prefix. This attachment sorting will be a crucial piece of functionality as we integrate the solution with Textract later.